I am so grateful for each and everyone of you that comes by and links up week for week :)
I am hoping you are liking the new voting option?
I have changed the rundown for the linky party a little to make it a little friendlier to you all.
Each week you will have 3 days from Thursday thru to Sundays to link your crafts.
On Monday, the linky will go over to the voting section of the party, where you will get a chance to vote for your favourite link of the week. I have decided to leave the voting part of the linky open to the following Friday - this will enable you to vote for your favourite link from the previous week at the same time as you are linking up your craft for the new week - complicated?
Date-wise might make more sense:
- Last week's linky voting is still open to you today, and will close tomorrow 19th July at 2:00pm CEST (You can vote for your favourite link HERE)
- This week's Linky party is now open so you can link your crafts below. You will have until Sunday 21st July to link your crafts.
- On Monday 22nd July voting will open for this week's favourite links and it will run until next week Friday 26th July.
As such there is no winner yet from last week's Linky party, the winner will be featured next week.
Thank you so much for all the amazing links form last week, I loved visiting each of them, so many awesome tutorials within the group, I love that, made my day :)
Okay, now onto today's easy tutorial - making paper chained flowers out of toilet rolls.
A Gonis Distributor shared this amazingly cute craft with us all and so I have re-created it for you here today so that you can also try them out :)
For this craft you will need:
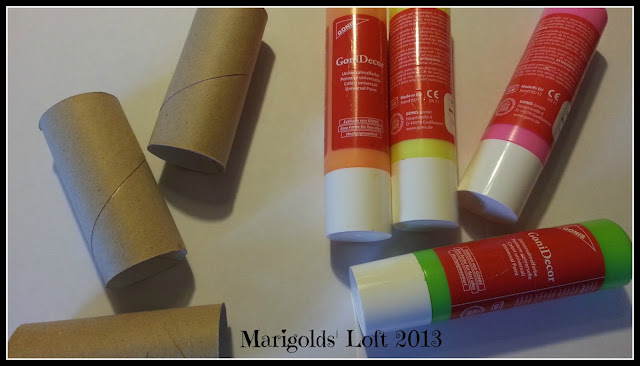
Empty Toilet rolls
Gonis Decor* (Universal paint) I used the neon colours
Rubbelcoll* (10 second craft glue)
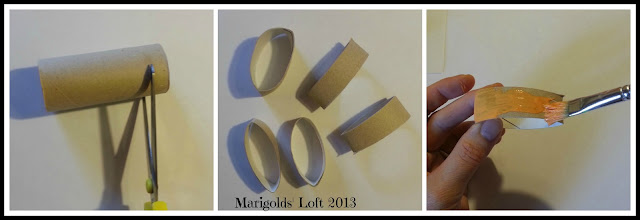
First, cut each toilet roll into 5 equal pieces and paint the outsides.
Once dry paint the insides in a contrasting colour.
After allowing to dry again, glue each of the 5 pieces together with the Rubbelcoll*
Once each individual flower is glued arrange them together and glue the petals together to create a simple, but eye-catching wall piece :)
*I use Gonis Products as I am a distributor and appreciate there amazing versatility and quality. If you cannot find these products in your area, you will have to substitute them hence the descriptions in brackets.
Rules for todays' Craft Linky Party:
- Firstly, your link must be craft related!
- Please do not link up goodies which are on other topics. I have a Sunday Linky Party for Social Media/Blogging Tips and Tricks, if you would like to link up your tips and tricks on this topic you can link them there :)
- Grab my button below and showcase it somewhere on your blog OR create a visible link.
- Do not Link if you are selling or advertising something.
- Be sure to only link the relevant Blogpost and not your whole blog.
- In linking below you are giving me the permission to use of your image if it is being featured the following week. If I am unable to use your image I can unfortunately not feature you.
- Please do not link up stuff you have already linked up before!
- Please note: I will remove content that does not abide by the rules mentioned above.
Talking of tutorials - I have started a Pinterest Community Tutorial Board. If you would like to contribute to that board, I would love to hear from you, send me an email and I will add you to the team which is already 10 people strong :)!
BTW: I have removed the Google+ Comments as I know some of you can't leave comments as you don't have a Google Profile, I look forward to hearing from you soon :)
BTW: I have removed the Google+ Comments as I know some of you can't leave comments as you don't have a Google Profile, I look forward to hearing from you soon :)


Natalie, thanks for hosting!
ReplyDeletethank you for hosting Natalie! I like your flower tuto!
ReplyDeletealways great tutorial (inspire me)
ReplyDeleteThanks for party
Hi Natalie
ReplyDeleteThat's very cute. I saw a christmas wreath made like this a while back with one main central flower and lot of others all around it.
Hi Natalie,
ReplyDeleteYour flower are so cute! What a great craft for kids to to learn about upcycling :)
hope you're having an awesome day.
Ang
Juggling Act Mama
Thanks so much for hosting this great party!! I just got back from camping so only just linked up! Better late than never?! Some really great links and projects :-D Have a great week and thanks so much for including my DIY Bow Tie onesies on your Pinterest board :-)
ReplyDeleteHannah ♫
Sew Lah Tea Dough
What a great way to re-purpose otherwise useless materials! You've got it down to a science, I can tell...very impressive. Thanks for the inspiration and tutorial!
ReplyDeleteZia
Heard about Asbestos Lawyer Pasadena