Welcome back to another edition of Tutorial Thursdays Linky Party.
Today I want to show you how to create some eye-catching, yet simple spring garden invitations.
For this craft you will need:
a Serviette with motif that you desire
Design Freezer* (a glue that "Freezes" Stuff into place)
Miralight clay* (A soft, lightweight, pliable clay that is air-drying)
Gonis Decor* (Universal paints used to decorate the card and clay)

First: Cut the serviette into the four pieces that are naturally formed by the folds.
Lay one of the quarters on a clear plastic map. Do not remove any of the back layers, leave it as is.

Using the Design Freezer* drench the serviette, I use a sponge to help me with this step, but if you prefer a brush use one, just be very careful to not tear the serviette.


Whilst the serviette is drying, take some of the Miralight* Clay, roll it out and using a cookie cutter cut out the forms that you will be using.


Once cut out allow the form to dry.

Decorate your form with Gonis Decor and Dekopointer

Place a blank card behind the serviette, punch and thread with ribbon.
Decorate the card with Gonis Dekopointer and there you have it :)

*I am a Gonis Distributor, if you cannot find these products in your vicinity you will have to substitute them - hence the descriptions in brackets.
Thank you so much for all who linked up their lovely posts last week,
there were so many fantastic posts from last week, I loved visiting each and every one of you.
This weeks featured links are:
Most Viewed:
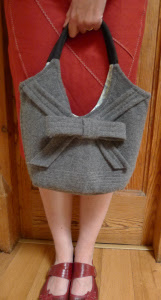
An amazing recycled bag by Vicky @ Vicky Myers Creations
And my Favourites:

These super chic paper Dahlias made by Stephanie @ Simply Dream & Create

This quick, cute headband made by Joanna @ Be Creative Mommy
Well-done ladies and thank you for sharing your wonderful Crafts with us all.
I have pinned your crafts on the PinBoard and added them to the Tutorial Thursday Album on my Facebook Page :)
You will also be featured in this weeks Newsletter
You will also be featured in this weeks Newsletter
(If you have a Facebook Page or account, I would very much appreciate a share :))
Don't forget to grab your button if you haven't done so already :)

Now it is your turn - what have you been up to this week?
Please feel free to link up your crafts below.
They do not have to be tutorials, I would love to see any crafts.
I have started a new Sunday Linky Party for Social Media/Blogging Tips and Tricks - If you would like

- Firstly, your link must be craft related! Please do not link up goodies which are on other topics.
- Grab my button below and showcase it somewhere on your blog OR create a visible link.
- Do not Link if you are selling something.
- Be sure to only link the relevant Blogpost and not your whole blog.
- Please be so kind and visit at least 2 other posts linked below, it is always nice to receive visitors, this is a linky party after all! :)
- In linking below you are giving me the permission to use of your image if it is being featured the following week. If I am unable to use your image I can unfortunately not feature you.
- Please do not link up stuff you have already linked up before!
- Please note: I will remove content that does not abide by the rules mentioned above.
Do you have your own Linky Party happening? I would love to hear about it!
Link it up HERE

Thanks so much for hosting, I got here super early this week so I'll be sure to come back tomorrow when all the links are in so there are lots more projects to check out :-)
ReplyDeleteHannah ♫
Sew Lah Tea Dough
Thanks for the party, Natalie !
ReplyDeleteLinda
With A Blast
Obviously I missed some great projects last week. :-)
ReplyDeleteLove the butterfly on the invitations! Thanks for hosting another party! :-)
ReplyDeleteI gave you a liebster award Natalie. I know you deserve to have an award. ;) http://jeicrochet.blogspot.com/2013/05/gods-blessings.html
ReplyDeleteI enjoyed this hopping around. I learn so much from several of you!
ReplyDeleteI'm a quilting newbie, but loved figuring out how to design a picket fence border. I've a long way to go to complete my picket fence border, but it's what I'm working on, so I thought it would be ok to "show & tell" an unfinished project. My photo shows it with some block swap BLOCKS that will be surrounded with my fence, trim and grass. Explained better on my blog!:)