.jpg)
Welcome back to Tutorial Thursdays Linky Party at the beginning of a new month of fun!
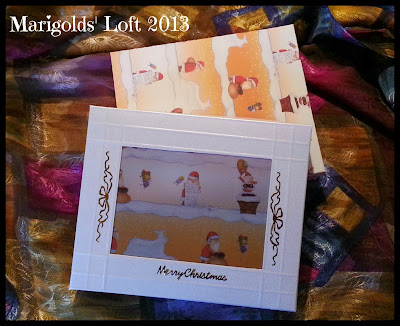
Today I am going to get the party going by showing you how to create this box:
For this Craft you will need:

2 Pieces of Cardstock 21 x 24cm
1 Piece of aperture covering 11 x 14cm
Ultimate Pro Crafters Companion
Tacky Glue
Double-sided tape
Embellishments
Paper clips
Start by making the base of the box.
1. Score along the 2nd groove line on the "Base" side, along all four sides.

.jpg)
Turn your Crafters Companion around so that you are working on the "Box Lid" side. Score the same four lines on the lid of the box, then score one groove up for a decorative edge, and then another groove up to show you where to cut out the aperture.

Once the box and lid lines are scored, glue the edges of the box. First cut triangles into all 4 corners. Add a dab of glue to each corner and stick together.


Before gluing the lid corners, attach the aperture by cutting out the middle of the lid. Stick double-sided tape inside the lid, attach the aperture cover/image.
Continue to finish the lid as with the base.
Embellish the lid and there you have it :)


This is a great way to create a unique individual gift box. You can make your box any size you desire.
For more info on the Ultimate Pro go HERE
2 Pieces of Cardstock 21 x 24cm
1 Piece of aperture covering 11 x 14cm
Ultimate Pro Crafters Companion
Tacky Glue
Double-sided tape
Embellishments
Paper clips
Start by making the base of the box.
1. Score along the 2nd groove line on the "Base" side, along all four sides.
Turn your Crafters Companion around so that you are working on the "Box Lid" side. Score the same four lines on the lid of the box, then score one groove up for a decorative edge, and then another groove up to show you where to cut out the aperture.
Once the box and lid lines are scored, glue the edges of the box. First cut triangles into all 4 corners. Add a dab of glue to each corner and stick together.
Before gluing the lid corners, attach the aperture by cutting out the middle of the lid. Stick double-sided tape inside the lid, attach the aperture cover/image.
Continue to finish the lid as with the base.
Embellish the lid and there you have it :)
This is a great way to create a unique individual gift box. You can make your box any size you desire.
For more info on the Ultimate Pro go HERE
Here is my how-to video so you can see the steps again:
And now it is your turn :)

This month the tutorial party has a theme - isn't that fun? :)
To be featured at the end of this month you will need to link up all your well-laid out festive tutorials.
Your tutorials can be creative, handwork, recipe or any other tutorial that you feel fits the bill.
The theme is Festive and I will be featuring all tutorials that fit that description - so anything to do with the festive season.
(For a tutorial to be featured it needs to be photo-rich and laid out in a step-by-step format)
Of course you can also link up all your other crafts and creations, I love to visit each of your lovely posts, but if you are looking for a feature this month you need to stay in the category :)
Remember:
If I feature 3 or more of your posts at the end of this month you will receive your own Featured post (Please note: this only applies if you have not had a featured post on Marigolds' Loft already. If you have been featured before, you will still receive a spot on my sidebar as a Tutorial Whiz for the month of December)