Welcome back to this weeks Tutorial Thursday Linky Party.
Today I am going to kick off by giving the floor to my lovely guest-blogger Gina.
Gina is going to explain to you how to create some simple desk organizers :)
Take it away Gina...
If
your home office is anything like a typical one it can sometimes turn
in to a random collection of papers shoved into drawers and work
items mixed in with personal items or bills. A great way to start
tackling that clutter is to make a home for all those things that are
laying helter-skelter around the room.
Cup
shaped holders are a great place to keep all the change, pens, keys
and other random things that accumulate on tables and counter tops.
If you make a holder for everything that tends to clutter up your
desk one for pens, one for keys, one for change, one for paper clips,
etc. then you’ll have neat little holders for everything you need
and you won’t have to go fishing through a drawer to find what
you’re looking for.
And
bonus when you make them yourself is that you can decide how big or
small they need to be, as well as what they look like so they can
match the décor of your room or stand out as accent pieces.
To
make these you’ll need:
A
quarter yard printed fabric, a quarter yard canvas and a quarter yard
of felt.
To
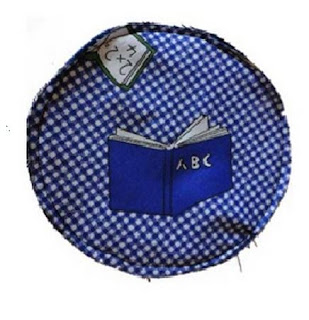
make the larger cup-shaped holder you’ll need to cut:
The
make the smaller holder you’ll need to cut
Put
your strips of fabric together with the print on the top and the felt
on the bottom. Stitch across the tops (the long side). Put the ends
of your strip of fabric together and stitch together down the short
side to make a circle shaped strip.
Put
your circles of fabric together with the print on the top and felt on
the bottom. Stitch together to make one circle piece.
Place
your side part and circles together with the printed side facing
inwards. Double stitch around the perimeter, clipping or pinning as
needed to make it easier to keep the fabric together as you sew.
Turn
it right side out and Ta-da! You should have a cup shaped holder now.
These
also make for great homemade gifts if your office space is already
neat and tidy.
Author
Bio: Gina Vasselli is a writer living in Myrtle Beach who works on
behalf of an online fabric
store, Fabric Street. She loves helping people find ways to
spruce up their homes and lives with crafts and recipes.
Thank you so much for this great idea Gina, don't forget to grab your Featured button below :)
xxxx
And now its' your turn :)
Last week's most visited link was:
This is such a great post, thanks so much for sharing
And my favourite Link of the week:
Such a cool way to recycle a CD Rack - Thank you.
Well-done ladies and thank you for sharing your wonderful Crafts with us all.
(If you have a Facebook Page or account, I would very much appreciate a share :))
Don't forget to grab your button if you haven't done so already :)

Now it is your turn - what have you been up to this week?
Please feel free to link up your crafts below.
They do not have to be tutorials, I would love to see any crafts.
:::NEW:::
I have started a new Sunday Linky Party for Social Media/Blogging Tips and Tricks - If you would like
to link up your tips and tricks on this topic you can link them HERE

Rules for todays' Craft Linky Party:
- Firstly, your link must be craft related! Please do not link up goodies which are on other topics.
- Grab my button below and showcase it somewhere on your blog OR create a visible link.
- Do not Link if you are selling something.
- Be sure to only link the relevant Blogpost and not your whole blog.
- Please be so kind and visit at least 2 other posts linked below, it is always nice to receive visitors, this is a linky party after all! :)
- In linking below you are giving me the permission to use of your image if it is being featured the following week. If I am unable to use your image I can unfortunately not feature you.
- Please do not link up stuff you have already linked up before!
- Please note: I will remove content that does not abide by the rules mentioned above.
Do you have your own Linky Party happening? I would love to hear about it!


+(1)+(1).jpg)


+(1).jpg)




+(1).jpg)


